Quick Start
If you want the short version before reading the full guide:
Divers in 60 seconds
- Add divers when boards and long leads can't reach your fish — typically when walleye are at 25–35+ feet and your board spread tops out around 15–20 ft.
- Divers are a depth and separation tool, not a replacement for boards. The best spreads use both.
- Master your board spread first. Divers add speed-sensitivity and complexity. A sloppy board spread with divers added is harder to manage, not easier.
- Start on setting 1 or 2 (moderate angle/depth). Move to setting 0 for max depth, setting 3 for max spread.
- Speed controls diver depth directly — faster = deeper, up to the diver's limit. Inconsistent speed = inconsistent depth.
- Change ladder applies the same way: speed first → lead length → diver setting → bait → color.
- Use ball-bearing swivels on both ends of the leader. Divers generate significant line twist without them.
- One diver to start. Learn how it behaves on turns, at different speeds, and when it fires before adding a second.
If you only do one thing: start with a single diver on setting 1 or 2 before adding complexity. Run it alongside your board spread and observe how it changes depth with speed, how it behaves on turns, and what happens when a fish trips it. One diver that you understand completely is worth more than four that you're guessing about.
What Divers Do (Plain Language)
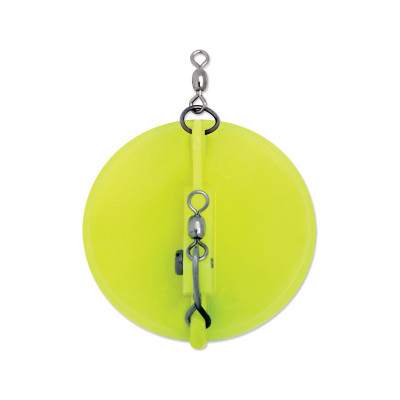
A diver is a disc-shaped device that attaches inline between your mainline and your leader. The disc is weighted and angled to dive when trolled, pulling your crankbait to a specific depth and holding it there as long as speed stays consistent. When a fish strikes, a trip mechanism releases the disc to a flat position, eliminating the resistance so you fight only the fish.
They Get Baits Deep Without Downriggers
The most common walleye diver — the Dipsy-style disc — can reach 20–35+ feet depending on size, speed, setting, and lead length. That's the depth range between where a long-lead crankbait on 10 lb mono tops out and where a full downrigger setup begins. Divers fill that gap without the complexity of cable, releases, and a downrigger arm.
They Create Lateral Separation
Divers have an adjustable setting that angles the disc to the left or right, pulling the line away from the boat as it dives. Setting 0 runs the diver straight back (maximum depth, minimum spread). Settings 1–3 progressively increase the lateral angle — at setting 3, the diver tracks significantly to one side. This separation is useful when fish are boat-shy or when you want to cover a specific structural edge without steering directly over it.
They Add a Trigger on Turns
When the boat turns, a diver set to an angle changes its path — it either surges forward and dives deeper (outside of the turn) or slows and rises (inside of the turn). This depth variation can trigger fish that were following but not committing. Experienced trollers use turns deliberately as a fish-triggering tool, especially when they've been marking fish on sonar without getting bites.
They Work Well Alongside Boards
Divers and planer boards cover different parts of the spread. Boards spread wide and run shallow to mid depth. Divers run inside the boards or off the back of the boat, reaching the deeper zone boards can't touch. Running both simultaneously gives you a three-dimensional spread — wide coverage at multiple depths — that covers far more of the water column than either tool alone.
When to Add Divers (The Clear Signals)
There's no universal depth number that makes divers the right choice — it's about what your board spread can reach vs. where fish are holding. Here are the specific signals that tell you it's time.
Signal 1: Fish Are Below Your Board Spread
You're marking walleye consistently on sonar at 22–30 feet. Your board spread with 85–100 ft leads on 10 lb mono is reaching 14–18 feet. There's a gap. No speed or lead adjustment closes it without making lead lengths unmanageable. This is the clearest signal that a diver is the right next tool.
Signal 2: Long Leads Are Creating Tangle Problems
You've extended leads to 110–125+ feet to get baits deeper and you're tangling on every turn. Divers let you reach the same or greater depth on shorter, more manageable lead lengths. A diver on a 60 ft lead can often out-depth a crankbait on a 120 ft lead, with much better spread control.
Signal 3: Fish Are Boat-Shy on Deeper Structure
You're targeting walleye on a reef crest or sharp break at 20–28 feet. Running directly over it with a crankbait on long leads spooks fish off the structure before your baits reach them. A diver set to angle away from the boat lets you position the bait on the structure while the boat passes further from it.
Signal 4: Wind and Chop Are Making Long-Lead Control Difficult
In heavy wind, long-lead lines sag, surge, and lose consistent depth. A diver's tension in the water actually helps stabilize the line, making it easier to hold a consistent depth in rough conditions than a long flat-line or board rod with an extended lead.
Simple decision tree
Fish deeper than 22 ft and board spread maxing out at 15–18 ft? → Consider a diver.
Leads over 100 ft causing consistent tangles? → A diver on shorter lead may solve both problems.
Marking fish on sonar but no bites on board lines? → Try a diver at a different depth before changing color.
Haven't mastered the board spread yet? → Not yet. Get the board spread clean first.
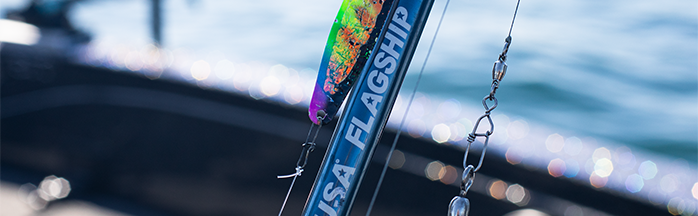
Start with the Dipsy or Jet Diver
Two different styles — choose based on depth target and leader setup preference
Boards vs. Divers: What Each Does Best
These tools solve different problems. Understanding the difference helps you decide when to run which — and when to run both.
What Planer Boards Do Best
- Wide horizontal coverage — boards spread lines 20–30+ feet per side, covering a large swath of water on every pass.
- Boat avoidance — baits stay well away from the hull and prop wash, critical on clear water and pressured fish.
- Multiple rods, simple management — boards scale from 2 to 6+ rods with good control and manageable tangle risk when leads are properly staggered.
- Shallow and mid depth — boards with various lead lengths cover roughly 5–20 feet depending on bait design and lead.
What Divers Do Best
- Controlled depth — divers reach 20–35+ feet with precision that boards and long leads can't match.
- Defined lateral separation — the angle setting puts the bait on a controlled path away from the boat, not just wherever the board walks to.
- Stability in rough water — a diver's tension holds line position better than a long lead in chop or current.
- Trigger action on turns — depth changes on turns are more dramatic with divers than boards, which can be a fish-catching advantage.
Best Combination Spread for Most Walleye Fishing
Boards on the outside, diver(s) inside or off the back. Here are two simple examples:
Sample spread A — 4 boards + 1 diver
Rod 1 — Inside Left Board: 50 ft lead · shallow crank (5–8 ft)
Rod 2 — Inside Right Board: 50 ft lead · mid crank (10–14 ft)
Rod 3 — Outside Left Board: 85 ft lead · shallow crank (6–10 ft)
Rod 4 — Outside Right Board: 85 ft lead · deep crank (14–20 ft)
Rod 5 — Diver, port side: setting 2, 65 ft lead · mid-deep crank (22–28 ft)
Five rods covering five distinct depth windows without tangling — as long as turns are wide and the diver is set to the correct side.
Sample spread B — 2 boards + 2 divers (deeper water focus)
Rod 1 — Outside Left Board: 85 ft lead · mid crank (10–14 ft)
Rod 2 — Outside Right Board: 85 ft lead · mid crank (10–14 ft)
Rod 3 — Diver Left, setting 2: 60 ft lead · deep crank (22–28 ft)
Rod 4 — Diver Right, setting 2: 60 ft lead · deep crank (22–28 ft)
Good for targeting fish on a deeper break while keeping mid-depth coverage with the boards. Two divers at the same setting mirror each other and are easier to manage than two at different settings.
Setup Basics (Intro-Level)
This isn't a complete diver manual — it's what you need to know to get a diver running correctly on your first trip.
The Setting Dial
Most Dipsy-style divers have a numbered setting ring that controls the angle the disc tracks relative to the boat's path. The exact numbering varies by manufacturer, but the concept is consistent:
- Setting 0 (or straight): diver runs directly behind the boat. Maximum depth, minimum lateral spread. Use when you want the deepest possible presentation.
- Settings 1–2: moderate angle off to the side — a balance of depth and spread. The best starting point for most walleye applications.
- Setting 3 (or maximum): aggressive angle, maximum lateral spread, reduced depth. Use when you need the bait to track far away from the boat or the hull.
Left or right direction is determined by which way you orient the disc when you clip it to the line — always run one diver to port and one to starboard so they spread away from each other rather than toward the same side.
Leader Length: Diver to Crankbait
Most walleye trollers run 8–15 feet of leader between the diver and the crankbait. Shorter leaders (6–8 ft) are easier to manage when landing fish — you can grab the diver without the lure dangling too far away. Longer leaders (12–20 ft) put more distance between the diver hardware and the bait, which can help with pressured or clear-water fish. Start at 10 ft and adjust based on bite response.
Swivels and Snaps
Use a quality ball-bearing swivel on both the mainline-to-diver connection and the diver-to-leader connection. Divers rotate and generate significant line twist. A cheap swivel or a swivel that's binding will put twist into your mainline within a few passes. Check swivels for smooth rotation before every trip — replace any that feel gritty or have resistance.
A crankbait snap at the end of the leader lets you swap baits without re-tying and ensures the bait runs freely without knot interference at the lip.
Main Line
20–30 lb monofilament or braided line is common for diver rods because the increased line pressure from the diver requires more abrasion resistance than a standard 10 lb crankbait rod. Braid with a fluorocarbon leader is a popular choice — braid's thin diameter allows divers to run deeper than equivalent-strength mono, while the fluoro leader reduces visibility near the bait. Whatever you choose, be consistent — mixing line types across diver rods makes depth comparison unreliable.
Depth Control (Practical Guidance)
Diver depth is controlled by four variables. Understanding how each one affects depth lets you make one deliberate change at a time instead of guessing.
The Four Variables
| Variable | Increase = ? | Decrease = ? | How Much Impact |
|---|---|---|---|
| Speed | Deeper | Shallower | High — most sensitive variable |
| Lead length | Deeper | Shallower | High — primary depth dial after speed |
| Diver setting | Shallower (more angle) | Deeper (less angle) | Medium — use to fine-tune spread angle vs. depth |
| Line diameter | Shallower (thicker) | Deeper (thinner) | Medium — braid vs. mono makes a significant difference |
What to Change First (When Depth Is Wrong)
- Speed — the most sensitive variable. A 0.2–0.3 mph change shifts diver depth noticeably. Adjust speed and make a full pass before touching anything else.
- Lead length — if speed adjustments aren't getting you where you need to be, lengthen or shorten the lead by 15–20 ft. Confirm with sonar.
- Diver setting — moving from setting 2 to setting 1 (less angle) adds depth. Moving to setting 3 (more angle) reduces it. Only change setting when you want to simultaneously change the lateral spread angle.
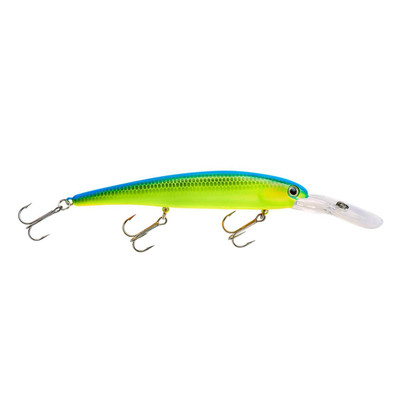
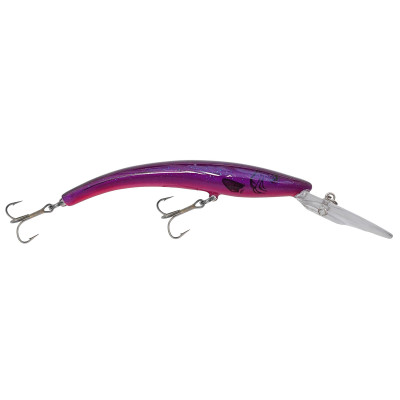
- Lure choice — a deeper-diving crankbait on the same diver leader reaches deeper than a shallow-diving crankbait. But the diver itself is still controlling most of the depth — don't expect dramatic changes from swapping cranks unless you're changing from a very shallow to very deep diver.
Confirm depth with your sonar
Published diver depth charts are estimates based on specific conditions. Your actual running depth depends on your exact speed, line, leader, and bait. After any setting change, watch your sonar for where the diver signal appears — most fish finders will mark the diver as a distinct return. Use that feedback to set leads and settings, not just the chart numbers.
The 3 Mistakes Everyone Makes
These three mistakes account for most of the tangles, missed fish, and frustrated trips that new diver trollers experience. Recognizing them in advance means you won't have to learn them the hard way.
Mistake 1: Changing Speed, Lead, and Lure at the Same Time
It's the most common mistake in trolling generally — and it's amplified with divers because each variable has a more dramatic effect than it does on a board rod. You adjust speed, swap the crankbait, and lengthen the lead all in one pass. Bites start. You have no idea if it was the speed change, the longer lead getting you to the right depth, or the new bait. Next time conditions are similar, you're guessing again.
The change ladder applies exactly the same way with divers: speed first → lead length second → diver setting third → bait style fourth → color last. One change. One full pass. Evaluate before touching anything else. This discipline turns a chaotic spread into repeatable results.
Mistake 2: Not Accounting for Turn Behavior
A diver set to an angle is on a specific lateral track — it's not just trolling behind the boat, it's tracking to one side. When you turn the boat toward that side, several things happen simultaneously:
- The diver slows, loses depth, and begins tracking toward the boat's path.
- Its line may cross board lines if the turn is too sharp or leads aren't staggered properly.
- On the outside of the turn, the diver speeds up, dives deeper, and spreads wider.
New diver trollers make sharp turns without adjusting and then wonder why everything is tangled. The fix is the same as with boards — wide, gradual turns are non-negotiable. Before turning toward a diver's side, slow the turn arc. Before a tight turn, bring the inside diver in. After any turn, confirm the diver is tracking correctly before making other changes.
Mistake 3: Wrong Rod, Wrong Drag, or Not Resetting Properly
Divers create significant line pressure — more than a board rod or flat-line rod. A soft, light-power rod doesn't have enough backbone to feel the diver properly or control the fight when a fish fires and the diver trips. Use a rod with enough power to manage the diver tension: typically a medium to medium-heavy action, 8–9 feet, rated for the line and pressure involved.
Drag should be set to allow a fish to take some line after the diver trips — not locked down. A walleye hitting a diver rod with locked drag often tears the hook out on the initial run because there's no cushion. Set drag at roughly 25–30% of your line's breaking strength and let the rod do the work.
After each fish, reset the diver trip mechanism before deploying again. A diver deployed in the tripped (flat) position doesn't dive — it just drags. Check the trip setting every time before lowering back down, especially early in the learning process.
Troubleshooting (Fast Checklists)
Diver keeps tripping without fish
- Release tension too light: increase tension so the release requires a deliberate pull to trip by hand. Wave action or line bounce shouldn't be enough to trip it.
- Speed too high: increased line pressure from trolling fast can trip a light release. Reduce speed 0.2–0.3 mph and test.
- Debris or wear on trip mechanism: pull the diver, inspect the trip mechanism for grit, weeds, or worn contact points. Clean and test before redeploying.
- Incorrect rod angle: if the rod tip is too high or the rod holder angle puts constant tension on the trip mechanism, it will trip at lower pressure thresholds.
Diver won't trip when fish hits
- Release tension too heavy — the fish can't generate enough pull to trip the disc. Reduce tension and test by hand.
- Trip mechanism worn or corroded — if the trip contacts are corroded, the release can bind and resist tripping even under significant load. Inspect and replace if needed.
- Fish hitting on the drop after the diver fires — sometimes what you feel is the bait free-falling after the line goes slack. Confirm by watching the rod tip rather than just feeling the hit.
Tangles on turns
- Turns are too sharp or too fast — slow down and widen the arc significantly.
- Diver on the inside of a turn is crossing board lines — bring it in before the turn or change the turn direction to put that diver on the outside.
- Leads not staggered enough — diver lead and board leads should be different lengths. If a diver at 65 ft and a board at 85 ft are on the same side, check that the 20 ft gap is sufficient for your turn width. Widen the gap if not.
- Diver setting too aggressive for the turn width — reduce the angle setting so the diver tracks less far to the side and has more room to move through the turn without crossing other lines.
Not hitting the depth you need
- Increase speed 0.2–0.3 mph — speed is the most sensitive depth variable for divers.
- Lengthen the lead by 15–20 ft — lead length is the second dial.
- Reduce the diver setting (less angle = more depth).
- Switch to thinner-diameter line or braid with a fluorocarbon leader — thinner line allows more depth at the same speed.
- Upgrade to a larger diver size — bigger discs generate more pull and reach greater depths.
No bites with divers out
- Confirm the diver is actually reaching the depth fish are marked at — use sonar to verify, not just the chart.
- Speed first — adjust 0.2 mph and complete a full pass before changing anything else. See Trolling Speed Control.
- Lead length second — change depth before changing bait or color.
- Check that the diver tripped properly before the last pass — a flat diver isn't fishing.
- Compare to board line results — if boards are getting hits and divers aren't, the depth zone may be wrong, not the bait.
Gear for Adding Divers to Your Spread
You don't need much to add a diver. Here's what to buy first and what to shop for each component.
Starter diver add-on list
- 1. Divers — 2 total (one per side, same size) — one diver to port, one to starboard. Same size so they behave consistently and are easier to compare. Master those two before adding more.
- 2. Ball-bearing swivels — required on both ends of the leader. Cheap swivels will twist your mainline within a few passes.
- 3. Crankbait snaps — fast bait changes without re-tying the leader.
- 4. Fluorocarbon leader material (10–15 ft) — low-visibility leader between diver and crankbait.
- 5. Medium-heavy trolling rod — enough backbone to manage diver tension and hook fish at depth.
Dipsy Diver + Jet Diver with Crankbaits
The two go-to divers, the cranks that run behind them, and the hardware to connect it all


Building the full spread from scratch?
The Walleye Trolling Starter Spread page covers boards, crankbaits, linecounter reels, and all terminal gear in a full bundle builder — configured by kit tier from budget to rough-water builds. Divers are included as an add-on for the rough-water and deeper-control kit.
Read Next
Walleye Diver Trolling FAQ
Add divers when walleye are holding deeper than crankbaits on practical lead lengths can reach — typically when fish are at 25–35+ feet and your board spread tops out around 15–20 ft. Also consider divers when long leads are creating tangle problems, fish are boat-shy on deeper structure, or rough water is making long-lead depth control difficult. Master a basic board spread first; add divers when depth or separation becomes the limiting factor.
They solve different problems. Boards spread your lines wide to cover shallow and mid depths while keeping baits away from the boat wake. Divers get baits deep with controlled lateral separation close to the boat. The most effective multi-depth spreads use both: boards on the outside covering 5–18 feet, divers inside reaching 22–35+ feet. Neither is better — they're complementary tools.
Depth depends on diver size, setting, speed, lead length, and line type. A standard Dipsy-style diver on setting 0 (straight) will reach roughly 20–30 feet on 50–75 feet of lead at 2.0 mph on 20 lb mono. Setting 3 (maximum angle) reduces depth significantly. These are starting-point ranges — use your sonar to confirm actual running depth before relying on it for a specific depth target.
Start on setting 1 or 2 for most walleye situations — this gives a balance of depth and lateral spread. Use setting 0 when you need maximum depth and minimum spread. Use setting 3 when you need the bait to track far from the boat and depth is less critical. Run one diver to port and one to starboard so they spread away from each other rather than both tracking to the same side.
Start with 8–12 feet of leader between the diver and the crankbait. Shorter leaders (6–8 ft) are easier to manage when landing fish. Longer leaders (12–20 ft) put more distance between the diver hardware and the lure, which can help on pressured or clear-water fish. Adjust based on bite response — if fish are hitting short or following without committing, try lengthening the leader before changing bait.
Yes — divers and crankbaits are a standard pairing. The diver is the delivery system; the crankbait provides the action and target. Use the same crankbaits you'd run on a board rod. Watch rod tip action to confirm the crankbait is running correctly at depth and speed — a steady, rhythmic pulse means good action. If the tip is dead or erratic, check speed and snap connection before assuming the bait is the problem.
Speed and diver depth are directly linked. More speed creates more water resistance on the disc, pulling the diver deeper up to its design limit. Slower speed reduces depth. A 0.3 mph speed change can shift diver depth several feet. This makes speed the most sensitive depth variable for divers — and makes consistent GPS speed critical. Inconsistent throttle means inconsistent depth.
Three most common causes: release tension set too light (wave action or line bounce is enough to trip it — increase tension until a deliberate hand-pull is required), trolling speed too high (increased line pressure mechanically trips the release — reduce speed 0.2–0.3 mph), or wear/debris on the trip mechanism (inspect and clean before each trip). Test tension by hand before every deployment.
Yes — running boards on the outside and divers inside is the standard multi-depth spread for walleye trolling. Boards cover shallow and mid depths; divers cover deep. Keep leads staggered, turns wide, and GPS speed consistent. Divers are more speed-sensitive than boards, so speed variation that might only shift a board slightly can shift a diver several feet. Consistent throttle management becomes more critical when running both.
Four rules prevent most diver-board tangles: stagger leads so the diver lead and board leads are at different lengths (minimum 20 ft gap from the nearest board lead); make wide, gradual turns — never sharp cuts; bring inside lines in before turning toward a diver's set side; and reduce diver angle setting if you need tighter turns. When you're first running boards and divers together, err on the side of wider turns than you think you need.